Friday, June 22, 2012

Chicken Stuffed with Butter

What's better than chicken with butter sauce on it?  Chicken with butter sauce IN it!  I've always been a fan of Chicken Kiev, and quite frankly I've always been fascinated by how people managed to make it and have the butter stay inside.  I wanted to figure it out, so why not cook it?

As a side dish I settled on Orzo with Parmesan and Basil.  Way back in the day my mom used to make an orzo dish with asiago cheese that I loved, and I've been looking for that recipe and can't find it anywhere, so I figured this would do.  Also, mom can you send it to me if you have it?

Chicken Kiev
- 4 skinless boneless chicken breast halves
- 1 Tbsp chopped green onion
- 1 Tbsp snipped fresh parsley (what the hell does snipped mean? that's stupid, I chopped it)
- 1 garlic clove, minced (or 4, we've already discussed my feelings on garlic)
- The recipe says 1/4 pound (pound?) of butter.  As much as I love butter that seems excessive.  You need 1 stick quartered into long sticks
- 1 egg beaten like a red-headed step child
- 1 Tbsp water
- 1/4 cup flour
- 1/2 cup bread crumbs (conveniently I still had some from the chicken piccata)
- 1 Tbsp butter (more butter, what the hell, you'll understand later)
- 1 Tbsp olive oil (it says cooking oil, but thats wildly vague)


Chop your green onion, parsley and mince your garlic.  I'm back home so I had my garlic press this time.  A few quick notes on chopping green onion in case you are unfamiliar.  Cut off the little sprouty end (where its white) and work your way from there.  I generally discard the last inch or so.  I actually don't know if this is how you are supposed to cut green onion, but its how I watched my parents do it, so it seemed like a good idea.

Combine the ingredients in a bowl, mix it around and set it aside.

Here's where things started to go horribly wrong for me.  Take the chicken breast and cover it in parchment paper and using a mallet pound it out to about 1/8 inch thick.  Seems simple enough right?  Well you'd be wrong, I definitely shredded one of the chicken tits.   It was not pretty.  So if it can't be pounded properly, wrapping it was going to be a real bitch.  Because of the pseudo-disaster that happened with the first one, I was a little more cautious with the others and really only pounded them to about 1/4 inch thick.

Once you're done pounding the chicken, sprinkle them with salt and pepper and coat one side with the green onion mixture.

The instructions then say to take on of the little rectangles of butter and place it the center of the chicken piece, fold in the sides and roll up.  This barely works at best.  My shredded piece of chicken was definitely a mess and the other pieces weren't thin or big enough to completely enclose the butter.

When you've rolled the chicken (poorly in my case), put the flour and bread crumbs on separate plates. And whisk the egg and water together on another plate.  Dip the chicken first in the flour (woohoo I didn't make my kitchen look like Whitney Houston's personal playground. Too soon? I never know.)

Next drag it through the egg, and lastly the bread crumbs.  This process was not nearly as fun as it was with just a chicken breast.  I was trying to keep them all rolled nicely, it was not easy.  Also, make sure you really get it coated with the bread crumbs, allegedly this will help "seal" the butter inside the chicken.  I'll be honest I'm not sure how well that worked.

Don't use bowls, really bad idea on my part
After rolling and breading (is that a word? it is now) the chicken, place it in a glass baking dish, cover and chill.  The recipe says for 1-24 hours.  I gave it about 35 minutes because quite frankly I was hungry and didn't start the recipe early enough.  We all have to make sacrifices.

Preheat the oven to 400.  When the requisite chilling time is complete, melt the other tablespoon of butter in a pan over medium-high heat and then add the oil.  Cook the chicken rolls for about five minutes, turning with relative frequency in order to brown all sides.  This was a disaster.  The chicken was trying to unroll itself, my tongs kept "removing" bread crumbs.  I was displeased.  Place them in a baking dish when finished (if you're smart, wash the one you already used.  Hooray for saving dishes and no e coli!)

Put the chicken in the oven uncovered for 15-18 minutes.  I went with 18.  There was still a little pink on mine so I let it ride for about 20 minutes or so.  When its all done, pull it out, put it on a plate and even spoon some of the drippings from the pan over the chicken.

Orzo with Parmesan and Basil


- 3 Tbsp butter (are you noticing a theme with my cooking and the amount of butter involved? I need some new recipes or more time at the gym)
- 1 1/2 cup Orzo
- 3 cups chicken or vegetable stock
- 6 Tbsp of fresh chopped basil (oh that is so much basil, who's excited - this guy)
- 1 cup parmesan cheese (slight variation, since I had been craving the asiago orzo recipe, I added a quarter cup of asiago as well.  extra cheese please)
- 1/2 tsp salt
- 1/2 tsp pepper

This recipe is unbelievably simple.  Even you can make it, yes you.  Melt the butter over medium heat and add the orzo.  Saute the orzo until its starts to get golden brown, just a few minutes.  Add the broth and cover and simmer for 20 minutes.  For those of you that don't know, let me drop some knowledge on you.  When it says simmer, that means reduce the heat and let it sit.  Actually I really hope that I didn't need to explain that to any of you, because if you didn't know that...you know what I won't even insult you even though I should.

When all the broth has been absorbed, remove from the heat add the basil and cheese and mix it all up.  Add salt and pepper to taste.  Yes this last step is basically every recipe's way of saying please take bites before actually serving this.  You know you wanted to do it anyway, now you have permission.

So here's how this went down. The chicken was a huge pain in the ass, ended up kind of ugly looking but still delicious.  It was cooked in butter, how could it not be?  The hero of the meal was definitely the orzo though, that was phenomenal.  Opened a bottle of Gnarly Head Zinfandel with dinner, which I hadn't tried before.  And as usual if you have the means I highly recommend picking it up, it was tasty.

I'm starting to wonder if I have really good luck picking out wines or if I'll drink anything I put in front of myself.  Either way I win.


Recipes: http://tastykitchen.com/recipes/main-courses/orzo-with-parmesan-and-basil-2/
http://www.recipe.com/chicken-kiev/


Wednesday, June 20, 2012

The Standards pt 1

There are a few things that I cook regularly.  And by regularly I mean constantly.  As they come up I'll alert you to their goodness and for the most part they are really easy.  For example, this salmon dish is one of my favorites to cook and eat.  In fact I've cooked this so often and for so many different people I believe it is starting to grow into an urban legend in Southern California.  The salmon that beats all other salmon.

Let me give you a little background, once upon a time I was introduced to a recipe for Beer Can Chicken by my eldest brother if I remember correctly.  Basically the recipe entails using an awesome cajun-style rub on a whole chicken, shoving a half full beer can up its butt and grilling it.  Yes its as good as it sounds.  I'll be sure to make the actual recipe and write about it sometime soon, it does require a grill and as I may have mentioned, I don't have one right now.  Anyway sometimes we don't always have the means or the need to cook a whole chicken, however I loved the spice rub so I started putting it on everything.  Literally I've used it on pork chops, asparagus, sweet potatoes, and my absolute favorite and the most delicious of all - salmon.

Beer Can Rub
- 3/4 cup Brown sugar
- 3/4 Paprika
- 3 Tbsp Salt
- 3 Tbsp Pepper
- 2 tsp celery seed
- 2 tsp onion powder
- 2 tsp garlic powder
- 1/2 tsp cayenne

Combine all of the ingredients in a small bowl (it might be worth putting into a small tupperware container because if you are just making a few pieces of salmon there will be left over rub).  Mix everything together as best as you can, you want to have a nice even mixture.

Coat the salmon, and I mean really coat the thing, don't be shy.  It ends up working out almost like a blackened salmon this way, which is why I like it.

Fire up the grill, or in my case the grill pan, because....well you know by now.  Make sure your grill (or grill pan) are running over medium-high heat.  It's probably better to err on the side of too hot with salmon.  Fish does not take very long to cook through and you want to be sure to get a little of that blackened effect on the outside, which you will not get over medium heat.  It just won't happen

If you're on a grill, close the cover, if you're me put a piece of tinfoil over the pan to trap as much of the heat as you can.  Here's my general rule for salmon, and I've cooked a lot of salmon in my day so you can trust me, let the salmon cook for about 3-4 minutes per side, no more.  Fish dries out very quickly, it really only takes a moment for it to go from perfectly cooked to over cooked so be careful.

Remember that warning about the difference in heat between equipment, I totally failed on that again.  I can't stress enough how much I want my damn grill back.  I'm about to start painting the walls of my building to help them finish the job.  No big deal though, dropped the salmon back on there for an extra minute or two and all was right with the world.

Simple enough right? That might be them most boring thing I've told you about yet.  However it is also one of the best, seriously try it, if you can't cook let me know and I'll make it for you.  Everyone loves my salmon, like I said, legendary.

Since I can make the salmon in my sleep I decided to do something a little interesting with my veggies. I decided to make roasted cauliflower thats been coated in a sage butter.  This is a recipe from one of Sara Foster's cookbooks, which I highly recommend by the way.  However I don't have these cookbooks anymore, its a really long story that I'd really rather not go into.  But I loved this cauliflower recipe so I thought to myself, "Self, you could probably remember the recipe and just wing it"

Roasted Cauliflower with Sage-Butter


- Cauliflower (obviously)
- dried sage (you could probably make it with fresh sage, but I literally have four things of sage in my spice rack because I keep forgetting I have sage and I buy more.  So no way I'm buying fresh sage when I have such a surplus)
- butter
- salt and pepper

I'd give you precise measurements, but since I was making it up as I went its kind of hard to say exactly what was going on.


Break down the cauliflower into little chunks and spread out on a baking sheet.  Oh, and preheat your oven to 400.

In a small pan melt some butter.  I started with about 2 Tbsp, but added and additional Tbsp when it appeared that there wouldn't be enough of the sauce when I was done.  When the butter is melted, add approximately 2 Tbsp of sage.  You can add more or less depending on how much sage flavor you're looking for.  Then add salt and pepper to taste.  I'm kidding, what are you going to do take spoonfuls of butter to taste the salt and pepper levels.  Actually that sounds really good.  Probably about 1-2tsp of each will get the job done.

One quick note, I didn't do this, and the final dish lacked a little bit of the flavor I was used to.  So definitely throw some in there.

Once you cooked the concoction a little bit, spoon it over the cauliflower in the baking sheet, and stick it in the over for about 15-20 minutes, depending on whether or not you like a little crisp on your cauliflower, I do so I always cook it a minute or two extra.  Halfway through use a spatula to turn the cauliflower otherwise it will be REALLY crispy on one side.

Throw in a little salad and you have a lovely little weekday meal that really doesn't take a lot of effort.

Throw in a bottle of William Hill Chardonnay followed by a bottle of Sterling Chardonnay and you'll find yourself a little tipsy on a weekday, oops.  But let me just say, both fantastic wine.  The William Hill especially was very good, a citrus-y chardonnay which is not usually my preference, but I loved it.


Here are the Sara Foster Cookbooks I was referring to, if you're interested.


Tuesday, June 19, 2012

Changing of the Guard?

Throughout my childhood my parents cooked.  Mom cooked all week, and dad would construct grilling and other masterpieces for Sunday dinners.  Perhaps it is because of their affinity for cooking that everyone in my family cooks.  My mom likes to say that she is proud to have sent her four boys out into the world with the ability to cook and do their own laundry.  So while in San Francisco this weekend, my brother and I decided to return the favor and let mom and dad relax while we concocted a meal so delicious, so supremely awesome that they would be impressed by our culinary prowess.  Also it would make for a good blog post.


My young brother selected the menu and I strapped in to do what I do best, man the grill. (I call him little brother sometimes but that doesnt seem appropriate when he towers over me by 4 inches and can toss me around like a rag doll, so glad I got my shots in back in the day when I could) 


The menu: Grilled Chipotle-Rubbed Steaks with Lime Butter and Corn Cakes with Avocado Tomato Relish.  I like the way he thinks.  


Grilled Chipotle-Rubbed Steaks with Lime Butter
- 4 Tbsp unsalted butter
- 1 small garlic clove, minced
- 1/4 tsp finely grated zest from 1 lime (for those of you that don't know.  lime zest or lemon zest, or any zest for that matter means just using a fine grater to shave some of the outer peel of the citrus fruit)
- 1 Tbsp fresh juice from 1 lime
- Kosher salt
- 1 1/2 tsp sweet paprika
- 1 1/2 tsp ground cumin
- 1 1/2 tsp chipotle powder
- 1 giant hanger steak


I was tasked with handling the steak while he took care of the corn cakes.  I was more than happy to take this on since I've been missing my grill for about two months.  The recipe is actually extremely simple but promised to be delicious.


I had never made "compound butter" before, but it turns out that just a fancy way of saying add the ingredient and mash/whip/mix altogether.  I divided the butter in 1 Tbsp increments figuring it would make the mixing part a little easier than dealing with one big 4 Tbsp chunk of butter.


Add the lime zest, lime juice, and garlic into a bowl with the butter and mix.  In this case the recipe calls for the garlic to be minced.  My parents don't happen to have a garlic press in their apartment, so I settled for chopping the garlic as finely as possible.   Sometimes you just have to make due with what you've got.


Once the butter is all mixed it can be set aside until the steak is cooked and ready to go.  In another small bowl, combine the paprika, cumin and chipotle powder.  Sift, shake, mix it all around into the dry rub that we will put on the steak.  


The actual recipe calls for 4 individual steaks, we're carnivores so we have one giant steak.  Rub the mixture over the surface of the steak, front and back.  Then head to the grill to get it done.
If you're dealing with a gas grill, fire it up and keep the lid closed to let it get nice and hot.  If you're dealing with charcoal, that's awesome, I actually have never been fortunate enough to have a charcoal grill of my own, so do whatever it is that you do to get the thing hot.


Generally with steak I will let the temperature get to about 400-450 degrees before putting the meat on. When you have gotten there, add throw the steak on there and close the lid.  If you are relatively new to grilling, resist the urge to open the lid and flip the steak over and over again.  It is not necessary at all and in fact it will take a lot longer to cook as you are letting the heat out.  The end result will be a charred overcooked outside and the meat will never get cooked inside.  I say all of this because this is how I used to cook everything. I'd flip a burger 5 or 6 times and then wonder why the center was raw when the outside was well-done.  You really shouldn't have to flip your meat more than once.  


View from the grill....not bad at all
Depending on the size of the meat will depend on how long you leave it before flipping.  Also grills are different, each grill will get hot at its own pace and so cooking times will vary.  Since this was an away game for me I actually got caught up in that myself, but I'll explain that in a minute.  With individual steaks on my home court I usually give them about 6-7 minutes on the first pass and then flip and give it another 5 minutes.  This leaves me with a wonderfully delicious and moderately still bleeding medium rare steak.  Because I was dealing with a bigger piece of meat I left it for about 9 minutes on side 1 and another 6 on side 2.  


I brought the steak into the kitchen and sliced into it to find that it was completely raw in the center.  I was then informed that the grill I was working with never really seems to get as hot as other grills.  So I ran back up and threw the steak back on the grill for another 5 minutes or so.  


It ended up being all kinds of medium-rare perfection.  But I definitely had a minute of thinking that I was going to screw up the meat in my moment to shine.  


Slice the meat and serve putting a bit of butter on each serving.  


For the corn cakes I'll turn things over to my esteemed guest blogger, Matthew.


Hello Internet. 


So as Daniel started writing this, I realized that maybe my internet musing would best be spent discussing food, rather than a completely unguided hodge podge of sports discussion, ranging from high school basketball to internet memes related to the NFL.  That said, the Cantina is still open, feel free to go back and boost those pageviews!


I decided that Friday night while we were in San Francisco, Daniel and I should cook dinner for our parents, because why not.  I had seen this recipe online and was very interested to try it out, and so I paired it with the hangar steak recipe that Daniel has discussed. 


First off: corn....... Well no, first off, prepare all of your ingredients.  Both of these, the corn cakes themselves and the relish, had large ingredient lists, so lay everything out first for a little relief when actually putting everything together.  Yes, this may mean more dishes since, in my cases, you'll use many bowls of many different sizes, but it also ensures you don't miss anything along the way.


Corn Cakes with Avocado Tomato Relish:
  • 3 large ears of corn, shucked
  • 1 cup all-purpose flour
  • ½ cup cornmeal
  • ¼ cup red onion, finely diced, optional
  • ¼ cup chopped cilantro
  • 1 teaspoon baking powder
  • ½ teaspoon baking soda
  • salt and pepper, to taste
  • 2 large eggs, lightly beaten
  • 2 tablespoons buttermilk
  • 2 tablespoons butter, melted
  • Canola or vegetable oil, for frying
  • For the relish:
  • 6-10 cherry tomatoes, halved
  • 1 scallion, minced
  • 2 tablespoons minced cilantro
  • 1 clove garlic, minced
  • Juice of half a lime
  • 1½ teaspoons olive oil
  • 1½ teaspoons white wine vinegar
  • salt and pepper, to taste
  • 1 ripe avocado, pitted and diced


 First off: corn.  Schuck and cut the corn from the cob of three large ears of corn. When doing this, rest the flat end of the corn in the bowl itself.  This gives some stability to the corn, and contains all the kernals when they go flying off the knife. Its like a splatter guard of sorts. Then comes the fun part. Take 2 cups of the corn and plop it in a food processor, and pulse and chop that bad boy up until purreed, but slightly chunky.  Kind of going for a chunky peanut butter consistency, which is what mine looked like. Pour that back in with the remaining raw corn.


Add in the dry ingredients and stir.


Add in the wet ingredients and stir.


Add in a spoonful of sugar, it helps...wait, wrong recipe.
View from the kitchen....we should always cook here


Set the corn mixture aside for now. Pop it in the fridge. Do it. DO IT.


So here's where the recipe falls short. The relish is fantastic.  really not a whole lot to it. And thats part of the problem.  There wasn't a whole lot of it. Honestly. I'd double the recipe for the relish and have leftovers, since it tastes pretty damn good on its own.  I got so excited a about the relish that I forgot take a picture of all the ingredients in their prep bowls, so here's a pictures of a scored avocado still in the pit.


Take all the relish ingredients and mix them in a bowl, but do hold off on adding the avocado, as it may brown if you leave it out. But brown avocado has never really stopped me from eating guacamole before. Then again, not a lot of things have really stopped me from eating in general, but I digress.


So now comes the fun part.  Pour some vegetable oil in a skillet (I used a cast iron one) and heat until it sizzles.  Fun fact: to find out if the oil is hot, run your hand under tap water, then give the skillet and Emeril BAM! to the oil. If it sizzles, let the corn caking begin.


Dollop out tablespoons of batter if you're lame.  Dollop out generous tablespoons of batter if you're awesome. Let it cook for abouot a minute, then flip[ it out and let it cook for another minute.  You could probably get away with less, as my cakes came out a liiiiiiiiiitle dry. When done, remove them to a plate lined with paper towels. Repeat until all batter used.


These were awesome. Sweteness of the corn mixed with the creaminess/acidity of the relish provided a nice balance of flavors.


Recipe courtesy of Buns in my Oven.....yes, I said Buns in my Oven... http://bunsinmyoven.com/2012/06/04/corn-cakes-with-avocado-tomato-relish/


Thanks to Matt for his contribution.  Since we were eating with mom and dad, pops takes care of the wine selection.  Trust me, if you were me, you would always want him in charge of the wine selection.  We had a bottle of Zinfandel from V Madrone which was exquisite quite frankly.

And of course, it wouldn't be complete without a look at the final dish.


Monday, June 18, 2012

Layout ADD

Yes I've changed the layout again.  Just trying to find something I like that allows me the most freedom to customize.  Bear with me, its possible more changes will come.

“There may not be a Heaven, but there is a San Francisco."


First, I need to use full disclosure.  We failed out attempt to be eating all day.  A: That's not easy to do, you get full really fast.  2- It's expensive.  However there was some good sampling in the two days spent wandering around San Francisco.

I arrived first thing Thursday morning, and I do mean first thing, when you're flight LANDS before most people get to work, that's early.  Anyway, me and the brother headed to AT&T park for a day game between the Giants and Astros, but first we had to stop and grab a little lunch.  We wandered into Ironside a few blocks from the stadium, a place apparently well known for its Cubano sandwich.  In the interest of getting the most out of our food tasting experience, we also got a Grilled Snapper sandwich and went halvsies.

Pressed Cubano
Country ham, slow roasted pork, gruyere and pickles

Dude, let me tell you, this thing is delicious.  The bread to filling ration was maybe a little off (I hate when you have way more bread than filling, where's the fun in that)  But you can't beat the flavor.  Here's where my problem comes in though.  Normally the cubano is a $12 sandwich, because it was game day they knock it down a whopping $2.  If I'm paying that much for a sandwich it better be the best damn sandwich I've ever had.  And quite frankly it wasn't.

I think I've been a bit spoiled by living in NYC for a while and picking up deli sandwiches all the time that were far more delicious and far less expensive.  I miss NY delis.


Grilled Snapper
Jalapeno aioli, pickled onions, butter lettuce, cilantro, & thai basil, and of course red snapper......very tasty!

I wasn't sure how I'd feel about a fish sandwich, but actually it was really good.  Definitely a much lighter option compared to the cubano, but very flavorful.

But again, I have the same problem with this as I did with the cubano, $10.  Also this was especially disappointing with the snapper because it definitely was not particularly filling.

However, all that being said, if you are in San Francisco and going to a game, I'm guessing you'll overpay for any food in that area, so I would definitely say stop by Ironside and try the cubano.

And if not for the cubano, then for the tallboys of PBR that you can get with it.


There wasn't a whole lot of eating at the game, because quite frankly, I'm not made of money and any sporting event is going to bend you over when it comes to price on food and drinks.

There was plenty of beer, but it really hurts to fork over $10 for a very average sized beer.  I'm just saying.


While walking home from the game, we wandered into Boudin Bakery Cafe on Market St in downtown.  Grabbed a few more sandwiches.  This time we went with the Pesto Roast Beef and Chicken with Chipotle Aioli.  I think my brother just likes ordering things with aioli.

Both sandwiches were satisfactory, again nothing that really blew me away, but good.  And given the adult beverage consumption that had been going on, I'm guessing anything would have been good, so I'll just leave it at that.


That night we got talked into grabbing "exotic drinks" at the Tonga Room.  Which is now one of my new favorite places.

The Tonga Room - Making it Rain

It's like walking onto a pirate ship.  There is a small pond in the middle of the lounge, with a floating band/dj.  Also every few minutes it rains.  They have waterworks that make it rain over the pond.

Here's the deal with the Tonga Room, which I knew nothing about before going there, the whole point are these ridiculously colored rum drinks.  And they have quite a selection.  I started with a strawberry daiquiri but ended up drinking an extremely Blue Hawaiian and then something called the Bora Bora Horror.  It. Was. Spectacular.  Let me put it this way, every drink comes with an umbrella, how can you go wrong with that?  Answer: you can't.

So here's what we tried:
Hurricane: rum, fresh pineapple juice, oj, lemon juice and sloe gin
This is the only drink that didn't get completely finished, not a favorite.

Blue Hawaii: white rum blended with blue curacao and fresh juice.
I drank two of them, fairly quickly, that's all I need to say.

Zombie: I don't know whats actually in this so I'll just give you their description: "A mighty grog laced with dark rum, the classic potion to keep you under our spell"
It was OK I guess, I wouldn't order it again.

Tonga Mai Tai: dark rum with triple sec and fresh juices.  Since my brother ordered this I should let him talk about it.  But he only took one sip and then I had to finish it.  He's my younger brother, on the right side of 30, shouldn't he be outdrinking me 11 out of 10 times?  Feel ashamed little brother, feel very ashamed.

Bora Bora Horror: rum, banana liqueur, grand marnier mixed with fresh pineapple juice.
This drink wins the night, damn those were tasty.  Also they're served in a glass that watches you...creepily.


A word of caution, if you stay too long at the Tonga Room, you might decide to climb one of the masts and dive into the pool/pond in the middle of the room.  I know because I was probably about a drink and half from doing this myself.  I didn't ask specifically but I have to imagine this is frowned upon by the establishment.


Friday was meant to be our epic eating day.  However, that never really materialized, although we definitely sampled some good food.  Wandering along the Embarcadero, we came across a food truck tucked off on one of the side streets.  Food trucks always seem to be a good way to sample some really good food so we stopped, ordered, and waited.  And waited.  They literally took 30 minutes to deliver our one burger and what they call the "Double Whammy" which is potlatch dusted french fries and green beans all piled together.  If you happen to know what "potlatch" is, I'd love to know, it was really good.

After the excessive waiting (small bonus, free cookies while you wait, and they were excellent) we finally sat down to try it out.  Conclusion: the burger was average at best, certainly nothing spectacular and certainly not worth waiting 30 minutes for.  The double whammy however was awesome, whoever thought putting fries and green beans together is part genius.  Add to that their homemade ketchup which was delicious, with a little kick to it, and that was definitely a food victory.


 We made our way to the Ferry Building for what we figured to be a smorgasbord.  We stopped at so many different places I'm not even sure I remember them at all.  For those of you who don't know the Ferry Building is like a giant market of awesomeness, with some extra restaurants sprinkled in for good measure.

One of the first stops was Stonehouse California Olive Oil.  Which is pretty much just a bunch of super fancy but awesomely delicious variations of olive oil.  The best part? Free samples!  A few of the favorites were the Garlic Olive Oil and the Chili Olive Oil which had a fantastic little kick to it.

Next up was Prather Ranch Meat Company.  The guy behind the counter rambled on a bit about organic blah blah blah, if you've read my About Me you know that this is not a concern of mine.  My concern is how tasty is it.  We didn't try any of the meat, although they mentioned a Maple Whiskey Sausage or something along those lines that had my mouth watering.  But we did try their German Potato Salad and Southern Style Coleslaw.

The German Potato Salad is the first non-mayonaisse based potato salad I had ever tried, and I would certainly eat it again.  It is made with bacon, caramelized onions, whole grain mustard and sherry vinegar.  When I ordered it I thought that I would probably find the mustard a little overpowering but the vinegar really mellows it and of course when there is bacon involved good things happen.

The Southern Style Coleslaw was also really good.  It is made with sweet onion, shredded cabbage and celery seed mayonaisse.  And actually its flavor and consistency were more like a light salad than the kind of coleslaw I'm used to, but it also was very good.

There is so much to choose from in the Ferry Building that it can be a little overwhelming.  However I wasn't about to sit down and order a full meal at each place so I stuck to free samples and small side orders.  Fortunately the San Francisco Fish Company was selling raw oysters and clams at two dollars a piece.  Perfect for my little experiment!  If of course you like raw oysters, which I do.  I can't really explain why I like them.  If I'm being completely honest and disgusting, they kind of have the consistency of snot.  But if you put a little cocktail sauce or horseradish on it, they can be very tasty little niblets.


We finished the day by stopping at Coldstone (always a good idea) then hiking back up to the top of Nob Hill.  Let me say this, eating ice cream before such an endeavor is not the greatest idea in the world.  However, you have now down a little work towards burning off said ice cream.

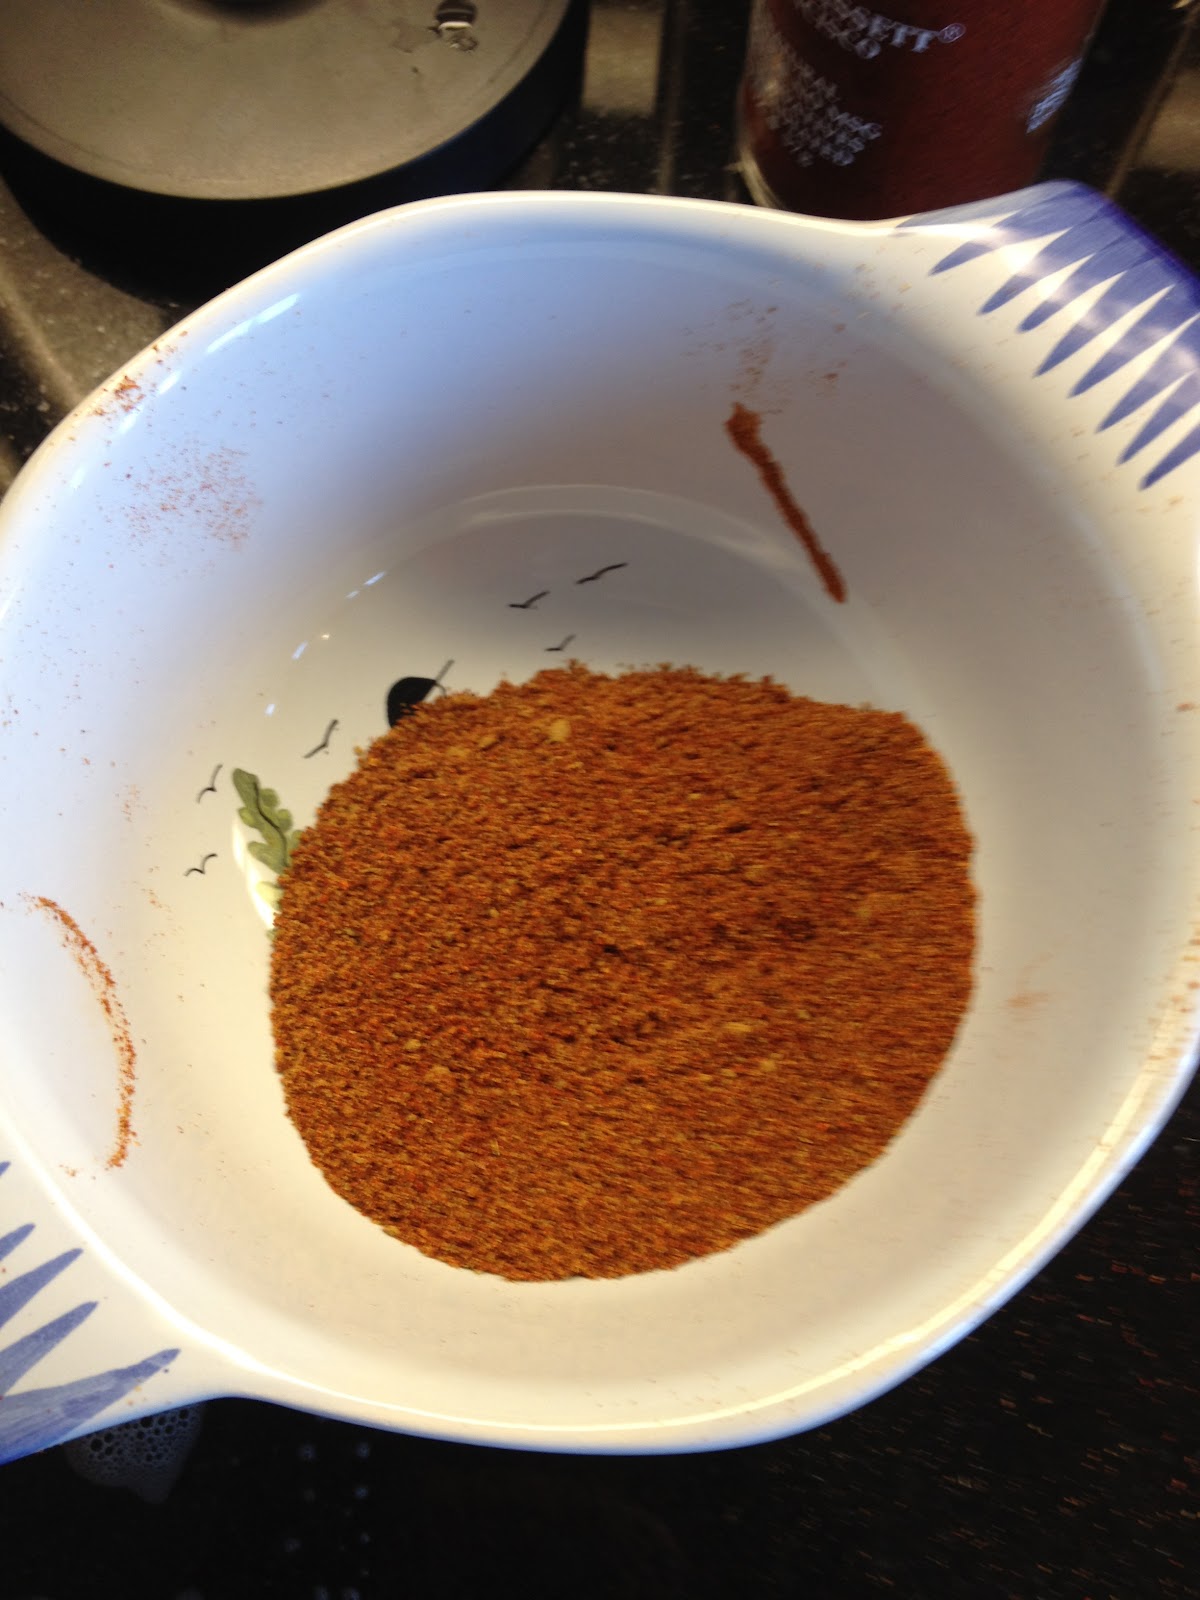
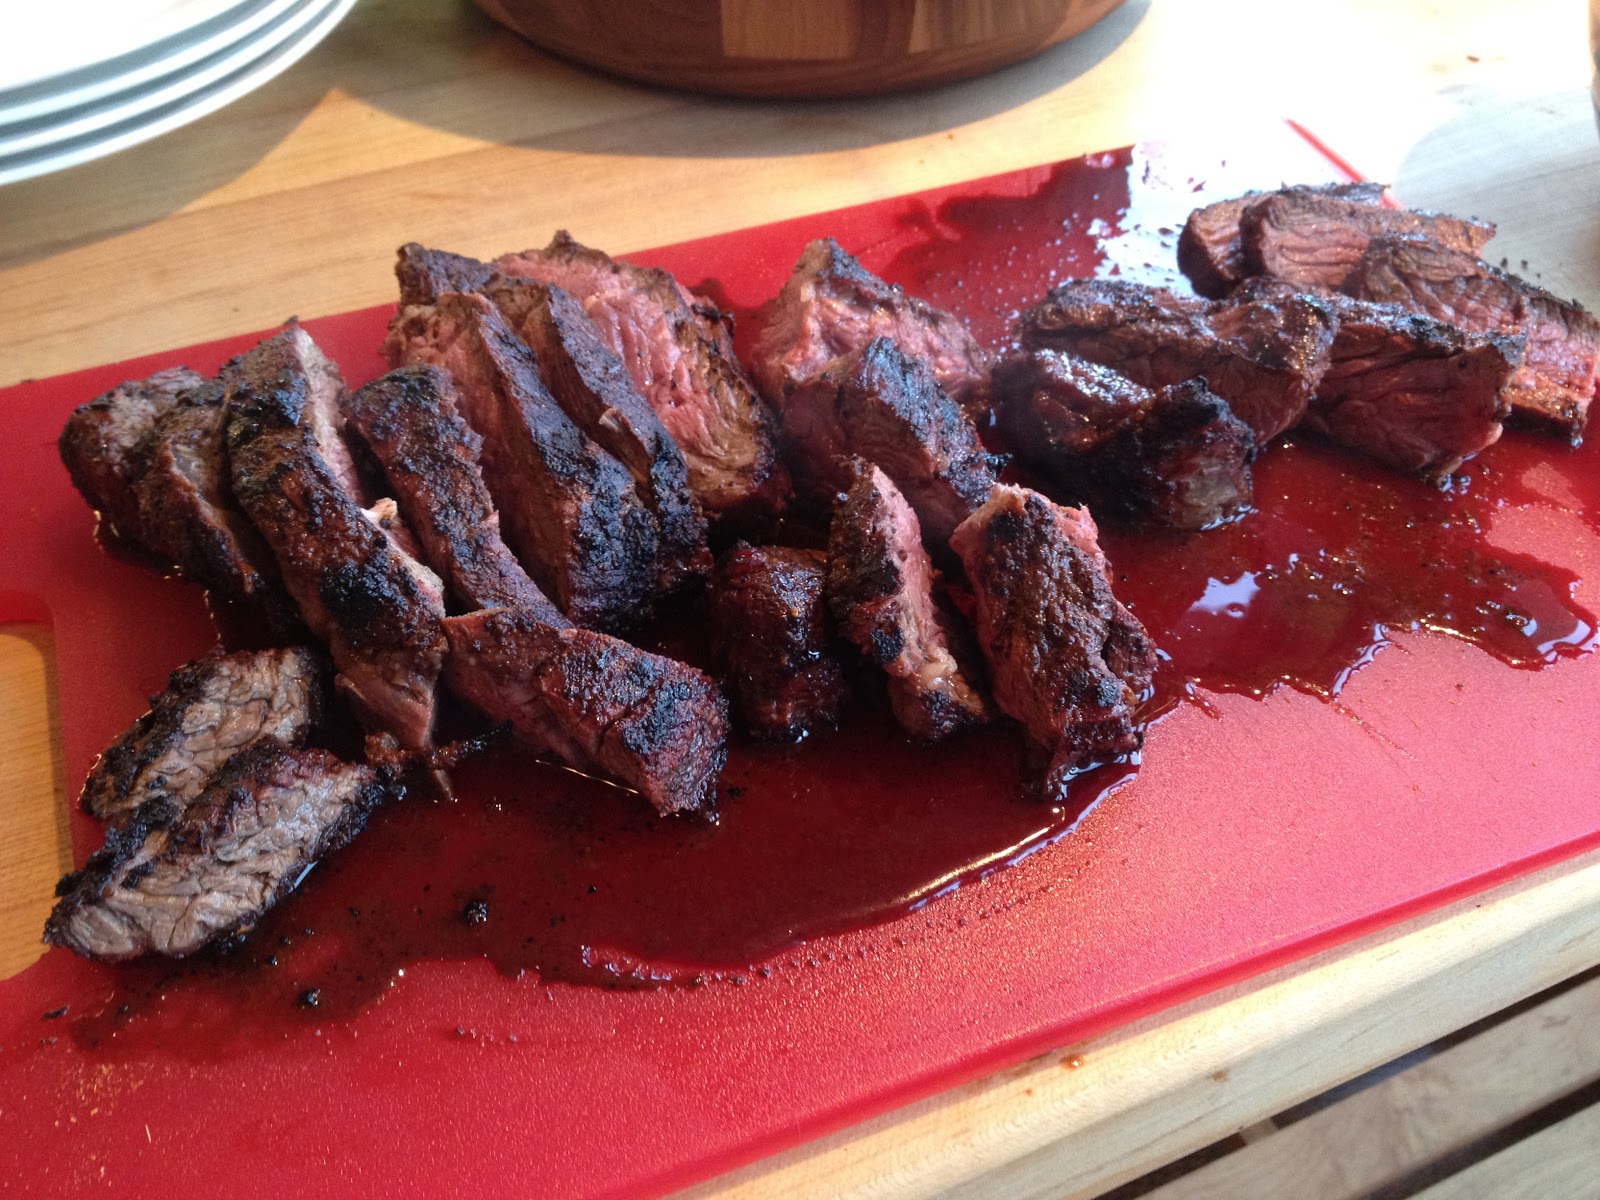
We finished that night by letting the parents relax while we cooked a little dinner for them. (full post coming soon)  And just to get your mouth watering, we made hangar steak with a lime-garlic butter and corn cakes with a tomato-avocado relish.  Also this next post will feature my brother as a guest blogger, since he put together the menu, I grilled meat, which is kind of a specialty of mine.


Matthew has requested an opportunity to defend himself for the events that occurred at the Tonga Room.  Against my better judgement I'll allow it.  But from now on this is not a democracy, and I will rule with an iron fist.  


Post script: in which i defend my honor.

I started our tropical adventure with a Tonga Itch, which was comprised of vodka, rum, orange curacao & pineapple juice topped with grenadine.  It was quite delicious and definitely my favorite drink of the night, considering what happened next.  For the second round, I ordered the Zombie. Even though it didn't say so, i could have sworn it tasted like cranberries.  In addition, this was the strongest drink of the night from anyone's glass, a fact that both the author of this "esteemed" (read: bush league) blog and our friend agreed to.  I managed to force my way through it and be a good sport, so when it came time for the Mai Tai, I wanted nothing to do with the coconut vehicled treasure. Plus it kept raining inside, which made kept making me want to pee. Maybe what they say is true.